Why Molded Thermoplastic Outperforms Generic Rigs
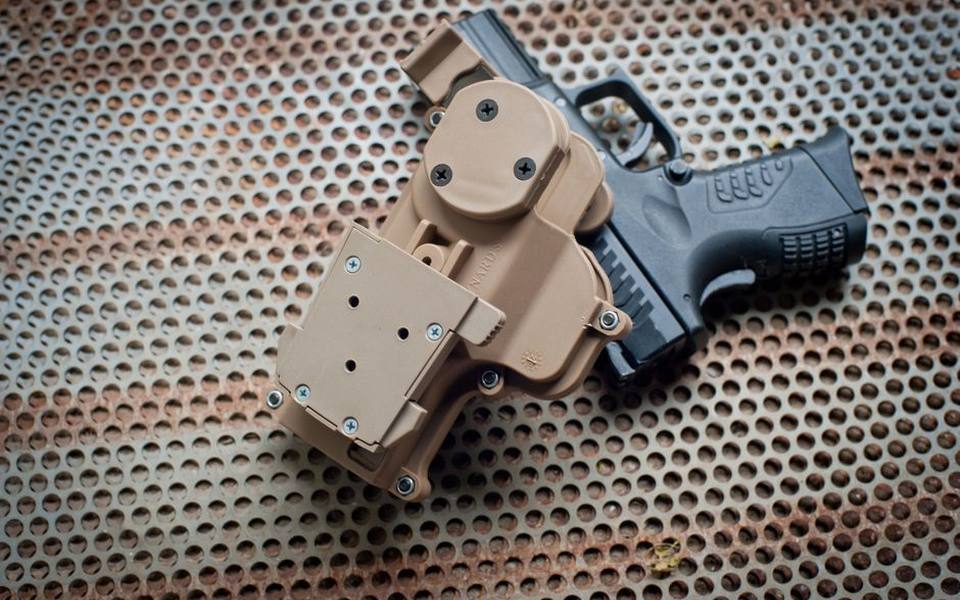
A proper holster must protect the trigger guard, hold your firearm securely during movement, and maintain an open mouth so you can reholster without using your support hand. Generic fabric sleeves and soft leather wraps often collapse when empty, forcing you to muzzle your own fingers during the reholstering step. Thermoformed sheets made from polyvinyl chloride and acrylic compounds solve this problem by retaining an exact, rigid shape indefinitely under normal temperatures.
Custom-formed shells are built using vacuum presses or mechanical foam clamping around precise firearm molds. Because the maker blocks out slide stops, extended controls, and tall sights before heating the sheet, the resulting pocket matches the exterior contours of your exact setup. This creates audible mechanical retention rather than relying on general friction, ensuring the gun stays put until you deliberately draw it.
Beyond retention, rigid shells offer unmatched resistance to sweat, moisture, and everyday friction. Leather absorbs body oils and moisture over time, eventually softening and potentially curling inward toward the trigger well. A custom polymer shell remains rigid year after year, giving you the identical tactile resistance and draw clearance on every single range repetition.
Investing in tailored construction also allows you to account for aftermarket modifications that mass-market holsters ignore. Whether you run an optic cut, an extended threaded barrel, or a compact weapon-mounted light, a tailor-made build wraps cleanly around your specific hardware without pinching or leaving dangerous gaps around the trigger.
Carrying Styles and Shell Profiles
Carrying inside the waistband behind the hip, commonly called strong-side carry, remains one of the most natural positions for shooters transitioning from standard range holsters. In this position, the holster sits between your body and waistband around the four or five o'clock spot. The shell requires a slight forward cant, typically ten to fifteen degrees, to align the grip along your natural torso angle and keep the butt from printing through your shirt.
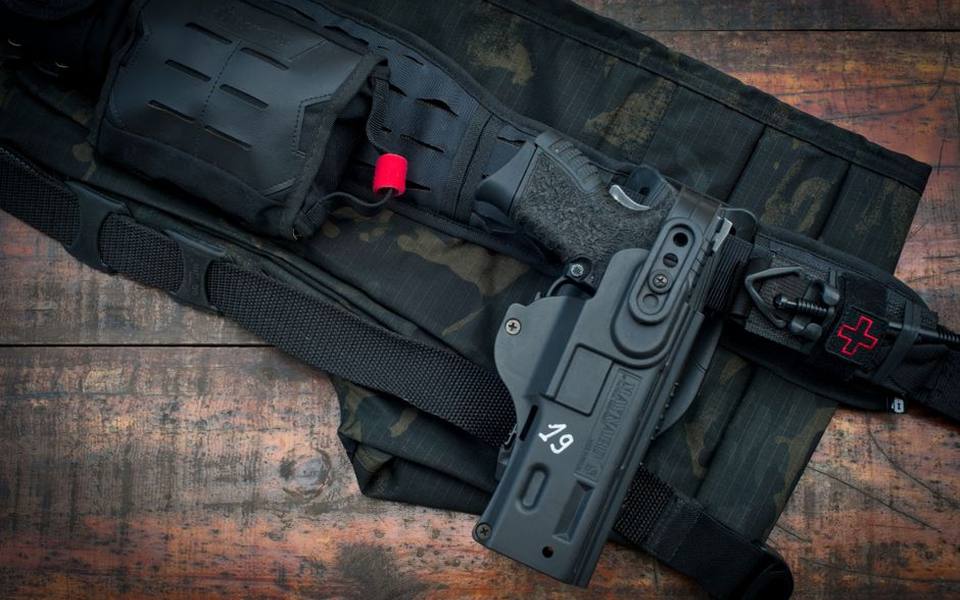
Appendix carry places the firearm directly in front of your pelvis, usually between the twelve and two o'clock positions. Because this setup centers the bulk along your centerline, it often conceals larger handguns effectively under light clothing. Custom builds designed for appendix use frequently incorporate claw attachments and molded wedges that lever against your belt to drive the pistol grip firmly inward against your abdomen.
Outside the waistband carry remains the standard choice for open carry, field work, and practical shooting competitions. These holsters ride on the exterior of the belt, either through injection-molded belt loops or heavy-duty pancake wings that pull the assembly close against your ribs. While harder to conceal without a coat or jacket, an exterior setup provides maximum comfort during long hours at the bench.
Fitting Rigid Shells to Modern and Classic Revolvers
Revolvers present distinct manufacturing challenges for rigid polymer gear because their geometry is dominated by a bulky cylinder rather than flat slide planes. In a semi-automatic, retention is typically set around the square edges of the trigger guard or light housing. A wheelgun requires the maker to carefully map retention around the front face of the cylinder or the frame contour just below the top strap.
Off-the-shelf universal holsters tend to pinch revolvers uncomfortably or rattle loosely because cylinder diameters vary widely between small, medium, and large frames. With custom molding, the builder creates a smooth relief channel for the cylinder flutes, ejector rod shroud, and front sight post. This relief channel ensures the front sight cannot snag on thermoplastic edges as the muzzle rises out of the pocket.
Barrel lengths also dictate holster balance when working with wheelguns. A snub-nose revolver has very little leverage inside the waistband, which can cause the grip to tilt outward over your belt line. Custom makers counter this keel effect by extending the kydex body an extra inch below short barrels, providing stable contact against the thigh and keeping the revolver upright.
Hammer spur styling is another critical design factor. A fully spurred hammer can dig uncomfortably into your flank when seated, while an internal or bobbed hammer allows a higher rear sweat shield. When ordering custom gear for a revolver, specifying whether your gun features a exposed target hammer or a smooth combat profile ensures the finished sweat guard shields your skin without hindering a full firing grip.
Tension Hardware and Mechanical Retention
Passive retention relies entirely on the spring tension of the molded polymer clamping over the firearm's natural edges. Most quality shells feature one or two adjustment screws positioned directly beneath the trigger guard. Backing these screws out loosens the shell's grip on the handgun, while tightening them compresses rubber or silicone spacers to increase the force required to release the weapon.
Finding the correct level of retention requires a simple balance check. With your firearm completely unloaded, place it inside the holster and turn the assembly upside down over a bed or padded surface. A properly adjusted shell should hold the weight of the unloaded handgun without letting it slide out, yet release smoothly when you pull firmly along the draw path without rocking or binding.
Screws can gradually back out due to body movement and vibration from vehicle travel or range sessions. Applying a drop of medium-strength blue thread-locking compound to each screw thread prevents unwanted loosening. Never use permanent red threadlocker on holster hardware, as you will eventually need to adjust tension or replace worn belt clips over the life of the rig.
Material Thickness and Comfort Enhancements
Sheet thickness in thermoplastic gear usually ranges from .060 inches to .093 inches, with each gauge offering distinct tradeoffs in durability and bulk. Ultra-thin .060-inch sheets are lightweight and easy to conceal, but they wear out faster under heavy training schedules. Heavy .093-inch material provides rugged defense against impacts during outdoor field use but adds noticeable rigidity against your hip bones.
The standard middle ground for concealed carry remains .080-inch material, offering structural rigidity without unnecessary bulk. This thickness holds crisp detail around retention points while resisting cracking at stress zones like belt attachment eyelets. When shopping for gear that will see weekly use, .080 inches typically delivers the best combination of service life and everyday comfort.
Sweat guards, which form the raised backplate between your body and the gun slide, come in full, mid, and low cuts. A full shield completely separates the metal slide and rear sights from bare skin, protecting the finish from body salt and keeping sharp rear sight corners from gouging your torso. However, a full guard must be contoured carefully so it never interferes with your thumb wrapping around the grip.
Belt Selection and Hardware Attachment Systems
The most advanced holster shell is completely useless if mounted to a flimsy, stretchable dress belt. Soft belts twist outward under the weight of a loaded firearm, causing the holster mouth to tip away from your body and destroying concealment. A purpose-built carry belt incorporates a stiff internal core, usually made of reinforced nylon or dual-layer leather, that supports vertical weight without sagging.
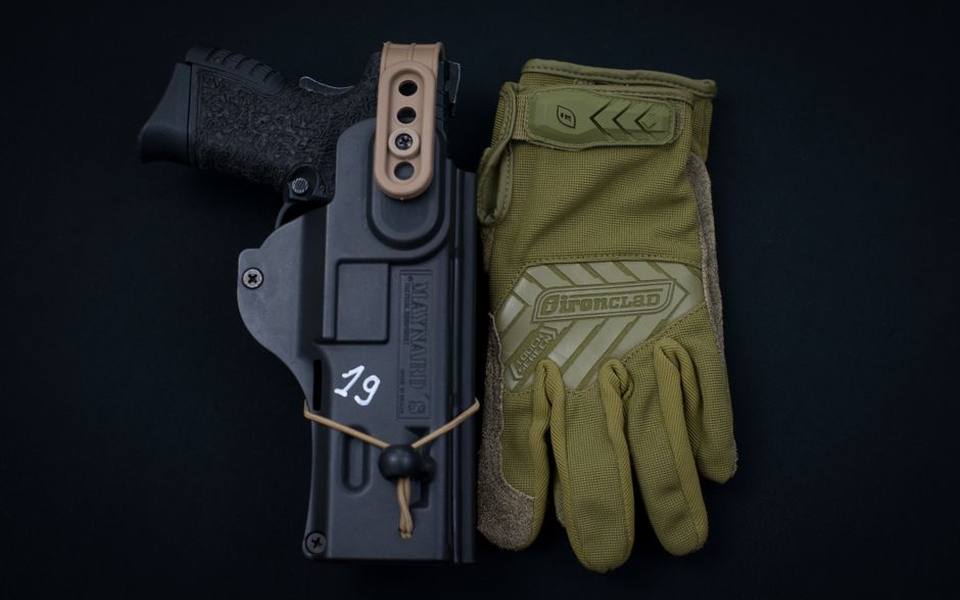
Attachment clips connect your holster to that sturdy foundation. Injection-molded plastic clips are common and cost-effective, but sprung steel or proprietary polymer clips offer superior bite under your belt edge. If a clip fails to hook completely beneath your belt, you risk drawing both the gun and the attached holster together during a rapid presentation.
Soft loops with directional pull-the-dot snaps offer an exceptionally secure alternative to open clips. Because these loops wrap entirely around the belt and lock closed, the holster cannot pull off under any angle of draw. When evaluating your gear setup, exploring options at local shooting range facilities helps you handle different attachment systems before settling on your daily carry setup.
Consider also how ride height affects your draw stroke. Setting the holster too low inside the waistband pushes the grip against your belt, preventing your fingers from sliding cleanly underneath the trigger guard. A medium ride height keeps the frame high enough to establish a secure master grip while keeping the center of gravity low enough for stable carry.
Mastering the Four-Stage Draw Stroke
A safe, efficient draw stroke breaks down into four deliberate stages that minimize wasted motion. In stage one, your support hand clears any covering garments away from your torso while your firing hand drives firmly downward into the holster mouth to establish a full master grip. You must secure your final shooting grip right here; attempting to adjust your fingers after clearing the holster invites fumbles.
Stage two involves pulling the handgun straight upward along the line of your body until the muzzle clears the top rim of the kydex. Keep your trigger finger indexed straight along the holster wall or gun frame throughout this movement. Once the muzzle exits the plastic mouth, you rotate your wrist downward toward your target while the gun remains close to your ribcage.
Stage three brings the firearm forward as your support hand joins the frame near your pectoral muscle. This position allows you to fire from retention if an adversary is too close for a full press-out. In stage four, drive both hands forward into your sight line, acquiring your sight picture and smoothly placing your finger on the trigger shoe only when on target.
Building muscle memory requires hundreds of clean repetitions at half-speed before working up to defensive speed. You can practice this mechanics sequence safely at home using an unloaded, verified firearm in front of a mirror to ensure your muzzle never sweeps non-target areas during the rotation phase.
Safe Reholstering Protocols and Trigger Discipline
Drawing a firearm quickly may be necessary in an emergency, but reholstering is almost always an administrative task that demands complete calm and zero hurry. There are no practical situations where you win points for snapping a handgun back into your belt at high speed. Taking your time prevents clothing, drawstrings, or gear straps from entering the mouth of the shell alongside the trigger.
Before sliding your firearm back home, take your finger completely off the trigger and lay it flat along the frame well above the trigger guard. Tilt your hips forward slightly to create space and glance downward to visually confirm that the holster mouth is completely clear of shirt hems, jacket pulls, and loose debris. Never reholster blindly by touch alone.
Insert the muzzle straight down into the pocket with steady, measured pressure. If you feel any sudden resistance, stop immediately and pull the gun back out to investigate. A bunched shirt hem trapped inside a rigid kydex pocket can act like a finger against the trigger face, causing a negligent discharge as the gun is pressed downward against resistance.
Live-Fire Practice and Range Etiquette
Many public indoor venues prohibit drawing from concealment during standard open lane sessions due to safety concerns. Before you arrive expecting to run presentation drills, review range rules or call ahead to ask about holster certifications. Many indoor shooting ranges require shooters to demonstrate safe holster handling to a range safety officer before granting draw privileges.
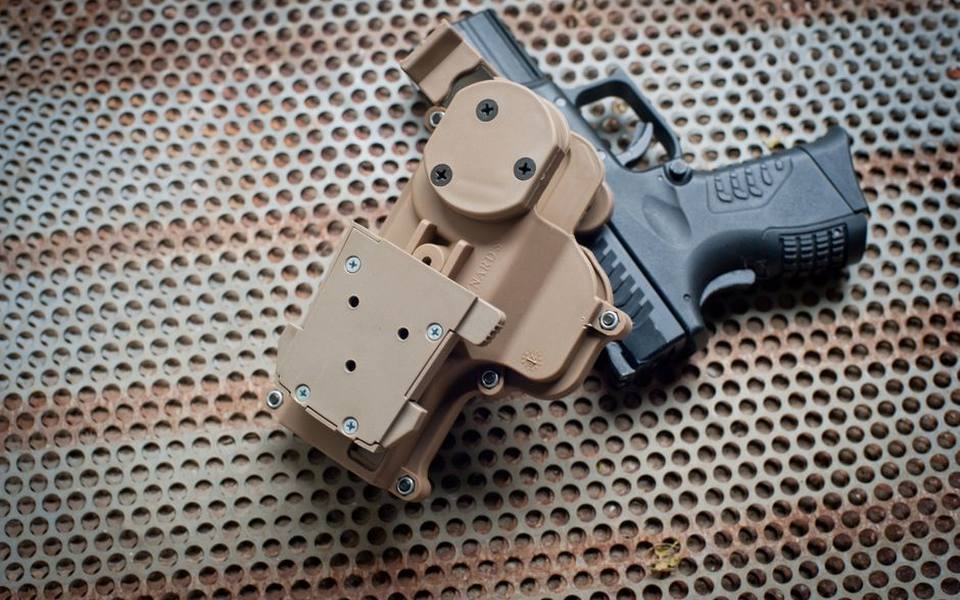
If your local facility limits lane work to firing from the bench, look for structured classes that rent out private bays. Signing up for training or certification classes gives you access to qualified instructors who can critique your draw stroke mechanics, spot wasted motion, and ensure your presentation remains muzzle-safe throughout live-fire strings.
When you do earn holster clearance, start every live session with slow, deliberate presentations rather than racing a shot timer. Focus on isolating your trigger finger until the sights settle on your target backer. Smooth transitions between stages yield greater speed over time than jerky, rushed motions that throw off your balance and sight alignment.
Practicing with rental gear or testing different platforms is another smart way to refine your preferences. Visiting facilities that feature shooting lanes and firearm rentals allows you to evaluate how different frame sizes and grip angles alter your natural presentation from the hip.
Cleaning, Maintenance, and Inspecting Wear Points
Thermoplastic gear requires very little maintenance compared to traditional leather, but neglect can still cause premature failure. Sweat, lint, and range carbon accumulate inside the shell over weeks of carry. This grit acts like fine sandpaper against your firearm's metal finish every time you draw, wearing away slide coatings and bluing faster than necessary.
Clean your holster once a month by unscrewing the belt attachments and washing the interior shell with warm water and mild dish soap. Use a soft nylon bottle brush or microfiber rag to scrub out the barrel channel and sight track. Rinse the plastic thoroughly to remove any soap film, then towel dry it completely before reattaching the hardware.
Inspect the stress zones around mounting holes and sharp molded bends for hairline cracks during each cleaning. While kydex is extremely resilient, repeated flex cycles and overtightened screws can cause stress fractures over several years. If you spot a crack starting near a belt attachment eyelet, retire the shell before it snaps during a range drill.
Finally, protect your gear from extreme environmental heat. Leaving your holster inside a closed vehicle trunk during summer heatwaves can soften the thermoplastic sheet, causing it to lose retention detail around the trigger guard. Store your carry gear inside a climate-controlled room alongside your other standard equipment.
Published 2026-09-21 · reviewed with each rebuild, last September 2026.
Find shooting ranges near you
The directory lists 6,919 shooting ranges by state and city — pick your state or use the “Near me” button in the header.
More guides
-
 Safety
Can a Felon Go to a Shooting Range? Federal Rules, Range Policies, and Shooting Sports Explained
-
 Money
MoneyGun Range Costs and Rental Guide: Fees, Ammo, and What to Expect
-
 Safety
Concealed Carry Permit Costs, Classes, and Certification Guide
-
 Service
Pinning and Welding a Muzzle Device: Legal Standards and Technical Steps
-
 Buying
FFL Transfer Fees, Background Checks, and NFA Kiosks Explained
-
 Buying
Where and How to Buy Police Trade-In Firearms Safely
-
 Owning
Beginner Guide to Long-Range Shooting: Distances, Tips, and Calculators
-
 Owning
How to Choose the Best Outdoor Shooting Range for Your Needs
-
 Safety
Indoor & Public Shooting Ranges: Etiquette, Costs, & Locating Ranges
-
 Safety
Gun Safety Courses, Hunter Education, and Concealed Carry Certification Guide
-
 Owning
Firearms Licensing, FOID Cards, and Background Checks: Verification, Processing, and Appeals
-
 Owning
Target Shooting Sports: Clay, Trap, Skeet, and Precision Rifle Disciplines
-
 Owning
Gun Cleaning Kits and Maintenance: Solvents, Bore Snakes, and Ultrasonic Cleaners
-
 Safety
Shooting Range Ear Protection & Custom Molded Earplugs
-
 Safety
Tactical Firearms Training and Advanced Defense Courses Guide
-
 Owning
Shooting Range Accessories: Eye Protection, Range Bags, and Shooting Rests
-
 Owning
Indoor Archery and Crossbow Shooting: Practical Range Guide, Zeroing, and Gear
-
 Service
Gunsmithing Services: Firearm Restoration, Stock Refinishing, and Custom Work
-
 Storage
Gun Safes and Storage Solutions: Biometric Locks, Humidity, and Ammo Storage
-
 Safety
Custom Molded Hearing Protection and Shooting Earplugs Guide
-
 Owning
Modern Shooting Ranges, Home Simulators, and Training Memberships
-
 Buying
Shooting Gear, Target Optics, Tools, and Ballistics Essentials
-
 Owning
Firearm Licensing, Permits, Background Checks, and Guard Rules
-
 Safety
Firearms Training and Self-Defense Classes: Beginner to Advanced
-
 Safety
Target Practice in the Digital Age: Viral Trends, Range Etiquette, and Practical Drills
-
 Safety
Tactical Defense Courses: Active Shooter Response, Medic Training, and Self-Defense
-
 Owning
Complete Guide to Kitchen Range Hood Venting, Ductwork, and Installation
-
 Service
Creative Birthday Photoshoot Ideas for Kids, Teens, and Adults
-
 Buying
Portable, Ductless, and Under-Cabinet Range Hood Selection Guide
-
 Buying
Commercial Kitchen Exhaust Hoods: Complete Selection and Ventilation Guide
-
 Safety
NRA Range Safety Officer Certification: Requirements, Training, and Field Expectations